Rubik’s Cube was created by Erno Rubik, a professor of architecture in Budapest, in 1974 as a means of teaching his students about spatial relationships. At the Nuremberg Toy Festival in 1979, the toy specialist Tom Kramer agreed to sell the Rubik’s Cube, then known as the Magic Cube, to the rest of the world. It grew into the most popular toy in the world, with over 350 million units sold. Even though it is sold as a toy, it is more of a work of art to Rubik.
While the Rubik’s Cube comes in many variants, from 2x2x2 to 5x5x5, the original version is the 3x3x3 cube. The original version has 11! × 8! × 212 × 38 (around 43 quadrillion) possible states and is the version covered in this study.

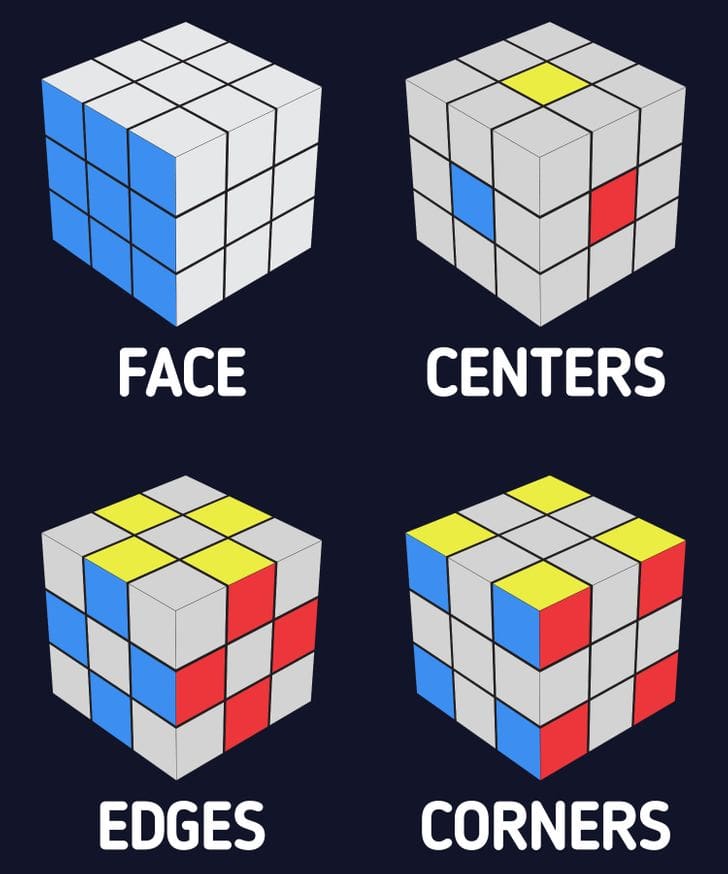
The pieces that make up the Rubik’s cube are called cubes. (The cube within the cube, much like in Inception).
There are 3 elements types of cubes:
Not all cubes sold in stores have the same colors, but always:
To remember this, add yellow to the color to find its opposite.
ex:
White + yellow = yellow
Blue + yellow = green
Here’s how to do it. You should always look at the cube in relation to its front face.
Face rotation: ![]()
![]()
Rotation of one of the 3 vertical rows: ![]()
![]()
![]()
![]()
Rotation of one of the 3 horizontal rows: ![]()
![]()
![]()
![]()
To be as efficient as possible, a cuber will move his cube as little as possible and save his movements. So, to rotate the face to the right, just use your index finger. Same for the rotation of the 1st horizontal row. Use the directory for the bottom horizontal row.

To make the Rubik’s Cube , you will have to choose a color among the 6. Obviously, choose a color that exists on your cube. Do not choose a mahogany or fuchsia pink color (unless you have an original and very ugly Rubik’s Cube with these colors).
So choose one of the 6 faces of the cube.
>> The goal is to complete a full face .
 It is advisable to always start with the same side, usually the white side . (on some cubes, the white side is black [unlike the King of Pop])
To find out where the white side is (very often the brand label is stuck on it):
>> Look for the white center piece.
Indeed, the 6 centers never move, they are fixed . These 6 centers form an axis around which all the other parts rotate.
Once the choice of the face is made, you must create a cross :
The objective of this step is to make a white cross . This cross is made up of 4 parts called “edges” (not to be confused with the bone spine which is found in the flesh of certain fish). An edge is made up of 2 colors.
Be careful, each piece has only one precise location on the cube.
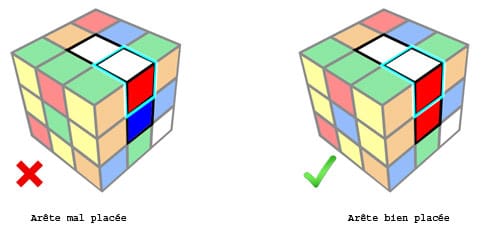
Thus, the red-white edge when properly placed is located precisely on the white face AND on the red face.
If 2 colors are reversed:
Here is the formula to follow:
– Place the part to be reversed in front of you (white side always up)
– Then:![]()
![]()
![]()
![]()
Mnemonic: History of the sliding door :
(The algorithm is done with the left hand EXCEPT to slide the door )
![]() I turn the handle with my left hand (even if I am right handed)
I turn the handle with my left hand (even if I am right handed)
![]() I open the sliding door
I open the sliding door
![]() I go inside
I go inside
![]() I close the sliding door (yes I have an exciting life)
I close the sliding door (yes I have an exciting life)
When the cross is done, it’s time to tackle the corners:
The corners are the last step (after the cross) which will allow you to finish the first face.
To go down / up a corner towards the face:

Then : ![]()
![]()
![]()
![]()
The Anglo-Saxons call this algorithm: “sexy move”. It is very pleasant to do. Repeat it 1000 times to hold it back and you will hold an anti-stress cube in your hands.
Did you know ? If you repeat 6 times (like the 6 faces of a cube) the same algorithm, your cube returns exactly to the configuration it was before the 1st algorithm.
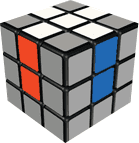
Once the first face is completed, your cube will look (roughly) like this:
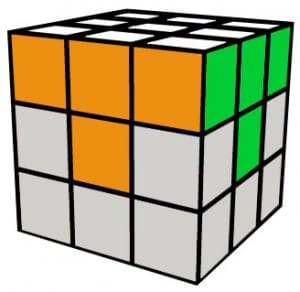
So it’s time to move on to step 2: Creating the 2nd layer.

To build the 2nd line, all you have to do is place the 4 edges . Indeed, the centers are already placed by default (since they do not move).

Remember:
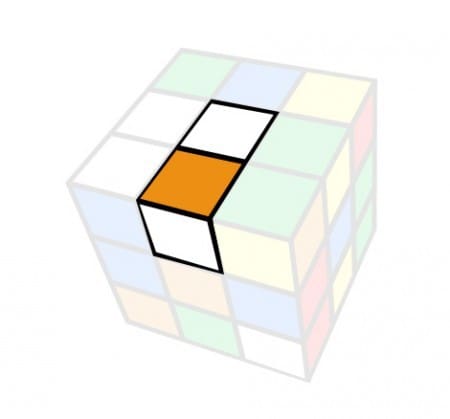
Thus, the orange-green edge must necessarily be located between the orange side and the green side.

To perform this task, it is necessary to know an algorithm. For the morons of us who don’t know what an algorithm is, here’s a simple definition:
ALGORITHM: Sequence of formal rules explained by a mathematical type representation and corresponding to a necessary sequence.
If this sounds complicated to you, a much easier to understand mnemonic device allows us to memorize this thing easily. It is…
the history of the Belgian
In our example: the Belgian is the Orange – green edge.
To complete the line -> it must therefore go to the right .
But he’s Belgian …
| 1) |  | He takes the wrong direction and goes left . |
| 2) |  | His friends on the right come down to come back. |
| 3) |  | The Belgian comes back to the right . |
| 4) |  | His friends are going home. |
| 5) | | Carried away in his tracks as a wounded man, the Belgian continues . |
| 6) |  | The Belgian, overwhelmed by existential absurdity, takes his whole face with him. |
| 7) | | Exhausted, he calms down and comes back . |
| 8) |  | The face comes back . |
After a few manipulations, you should arrive at this:
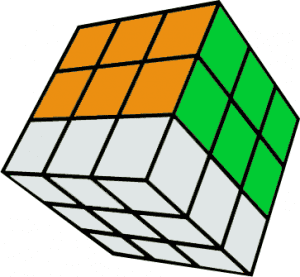
It is finally time to move on to the final step, namely, the 3rd row.

This is the longest stage, but not necessarily the most difficult.
It will be necessary :
The cube is turned over, white face down . We are going to take care of the opposite side, ie the yellow side .
If the cross is not already created, locate one of the following two patterns:
a) The horizontal bar

![]()
![]()
![]()
![]()
![]()
![]() This algorithm is easy, it is about a sexy move (right hand) surrounded by two rotations of faces (start right hand and the last 2 moves left hand).
This algorithm is easy, it is about a sexy move (right hand) surrounded by two rotations of faces (start right hand and the last 2 moves left hand).
b) The comma

![]()
![]()
![]()
![]()
![]()
![]()
Here are two mnemonics (to choose from) that I suggest: I have named,
The severed hand in the future :
![]() 1. I am going to the future in search of adventure
1. I am going to the future in search of adventure![]() 2. An automatic laser sliding door opens
2. An automatic laser sliding door opens![]() 3. I pass my hand to check if it is safe
3. I pass my hand to check if it is safe![]() 4. But the door closes on my hand and the cup
4. But the door closes on my hand and the cup![]() 5 . My hand falls to the ground
5 . My hand falls to the ground![]() 6. I return to the past, penguin
6. I return to the past, penguin
If you don’t like the algorithm (I’m my favorite) try this one:
Back to the future :
![]() 1. I go to the future
1. I go to the future![]() 2. I open a box with my right hand
2. I open a box with my right hand![]() 3. I take out the super important paper
3. I take out the super important paper![]() 4. I close the box with my left hand (since I have the paper in my right hand)
4. I close the box with my left hand (since I have the paper in my right hand)![]() 5. I slide the paper in my pocket
5. I slide the paper in my pocket![]() 6. I go back to the past
6. I go back to the past
Attractive ! You have just created a cross. Go to 2. Orientation of the cross.

The cross is created, but that is not enough, it is not yet oriented. Once again, it is a question of correctly positioning the edges.
The cube is always held yellow face up (and white face down ).
The following algorithm allows you to move all the edges, except the one facing us, a quarter of a turn clockwise.
>> To help us we will use a story,
The history of the chair:
1) ![]() The Belgian gets up from his chair suddenly
The Belgian gets up from his chair suddenly
2) ![]() x2 As he is in good shape, he goes very far
x2 As he is in good shape, he goes very far
3) ![]() But his chair falls (less in good shape than the Belgian in the chair)
But his chair falls (less in good shape than the Belgian in the chair)
4) ![]() The Belgian comes back a little (x1) on its not
The Belgian comes back a little (x1) on its not
5) ![]() Straighten his chair
Straighten his chair
6) ![]() Returns to stand in front (x1) his chair
Returns to stand in front (x1) his chair
7) ![]() if down again
if down again
After a few manipulations, the cross is oriented:

With the edges in place, it’s time to take care of the corners. To put each corner in its right place (regardless of orientation), you need to:
– Look for a well positioned corner . That is to say, a corner whose 3 colors correspond to the neighboring (adjacent) faces.
– Place this corner at the top , on the right (yellow side at the top).
– Use the Story of Madame Curieuse :

1. ![]() Her friends on the left go up
Her friends on the left go up
2. ![]() Madame Curious goes to see them
Madame Curious goes to see them
3. ![]() Her friends on the right go up in turn
Her friends on the right go up in turn
4. ![]() Madame Curieuse goes to see them (too predictable the girl)
Madame Curieuse goes to see them (too predictable the girl)
5. ![]() The girlfriends on the left are fed up and go downstairs
The girlfriends on the left are fed up and go downstairs
6. ![]() Madame Curieuse comes back to say goodbye to them
Madame Curieuse comes back to say goodbye to them
7. ![]() The girls on the right go down
The girls on the right go down
8. ![]() Madame Curious FINALLY returns to her place
Madame Curious FINALLY returns to her place
Here is the last step.
– Place two incorrectly oriented corners at the top right (on the right side).
– Use the bouncing chair algorithm: (this is the story of the chair + the same story of the left hand)
The history of the chair:
1) ![]() The Belgian gets up
The Belgian gets up
2) ![]() x2 Goes very far
x2 Goes very far
3) ![]() His chair falls
His chair falls
4) ![]() He retraces his steps a little
He retraces his steps a little
5) ![]() Straightens his chair
Straightens his chair
6) ![]() Comes back to his chair
Comes back to his chair
7) ![]() Sits down
Sits down
8) ![]() He gets up with his left foot
He gets up with his left foot
9) ![]() x2 Goes very far
x2 Goes very far
10) ![]() The chair falls
The chair falls
11) ![]() But the Belgian is fed up and goes even further
But the Belgian is fed up and goes even further
12) ![]() The chair bounces
The chair bounces
13) ![]() The Belgian continues on his way
The Belgian continues on his way
14) ![]() The chair falls
The chair falls
And there you have it, the cube is finished!
Congratulations , you have reached the end of the tutorial.
Also, don’t think you’re done with the Cube, solving it is one thing, setting speed records is another.


Leave a comment